How to install Brick Tiles
HOW TO INSTALL BRICK TILES
Why professional brick slip installation makes the difference
Professional brick slip installation requires accurate setting out, clean corner details and consistent joint widths.
Brick tiles, also known as brick slips, provide the appearance of traditional brickwork without the depth and weight of a full masonry wall. They can transform fireplaces, feature walls, extensions, garden rooms and commercial interiors. However, producing a finish that genuinely looks like brickwork requires more than simply sticking tiles to a wall.
Professional installation recommended
The final appearance depends on the condition of the background, the brick bond, course levels, corner slips, cuts and pointing. Poor installation can leave uneven courses, inconsistent joints, weak adhesion and an obvious tiled appearance.
What Are Brick Tiles?
Brick tiles are thin sections of real or manufactured brick. Most are approximately 20–25 mm thick, although dimensions vary between products. Matching corner slips are normally used around external corners, reveals and fireplace openings so the finished surface resembles full brickwork.
They are commonly used for:
Fireplace surrounds and chimney breasts
Internal feature walls and kitchens
Extensions, porches and garden rooms
External elevations and decorative cladding
Commercial interiors, restaurants and retail spaces
Before Installation Begins
The background must be structurally sound, clean, dry and suitable for the combined weight of the brick slips, adhesive and pointing mortar. Loose paint, wallpaper, weak plaster and contamination must be removed. Uneven walls may need rendering or levelling before installation.
The adhesive must be applied to a properly prepared surface and worked within the manufacturer’s open time.
How to Install Brick Tiles
1. Inspect and prepare the surface
Check that the wall is secure, sufficiently flat and free from dust or loose material. Depending on the background, a primer, bonding coat, render or approved backing board may be required.
2. Plan the brick bond
Decide whether the slips will be laid in stretcher bond, Flemish bond, English bond, stack bond, herringbone or another decorative pattern. The bond should be planned before any adhesive is applied.
3. Set out the course heights
Use a laser level or accurate datum line. Do not simply follow a floor, ceiling or fireplace opening, as these may not be level. Calculate the slip height plus the joint width so the courses finish neatly.
Accurate measuring, cutting and alignment are essential throughout the installation.
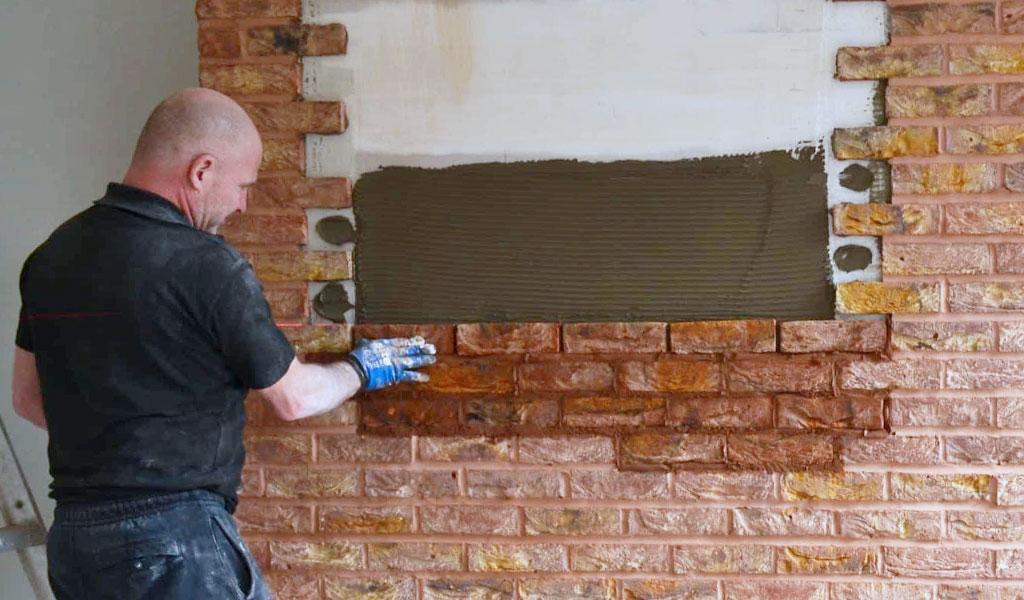
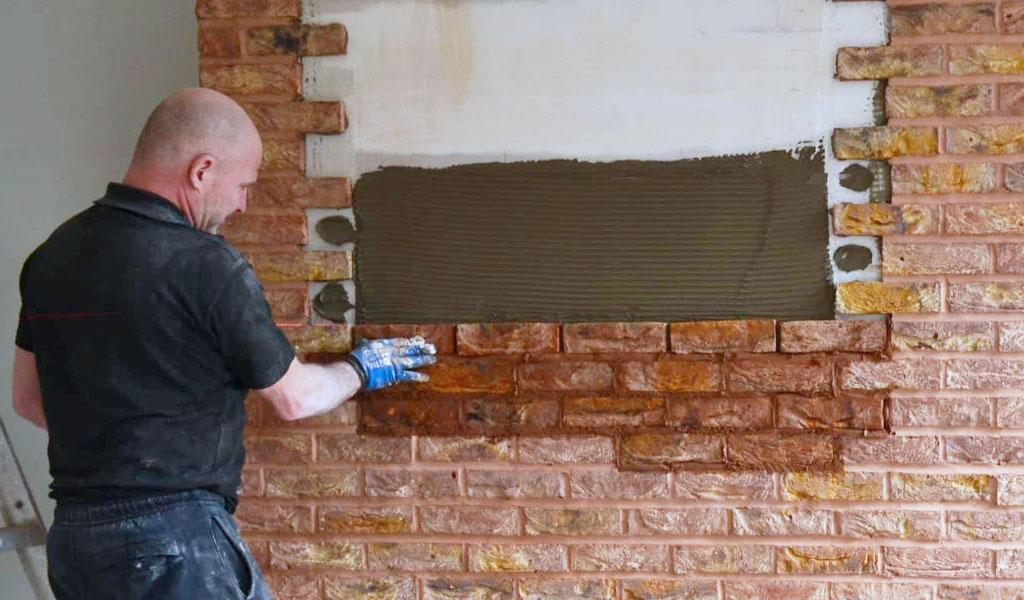
4. Apply the correct adhesive
Use an adhesive recommended for the slips, background and environment. External work and fireplace installations may require specialist products. Spread only as much adhesive as can be covered before it skins over.
5. Fix the brick slips
Press each slip firmly into the adhesive and maintain a consistent joint width. Draw slips from several packs so natural colour variations are distributed evenly across the wall.
6. Complete corners and openings
Corner slips should alternate correctly with the bond. Cuts around sockets, doors, windows and fireplace openings must be measured accurately and positioned so narrow or awkward pieces are avoided.
7. Allow the adhesive to cure
Follow the adhesive manufacturer’s curing time before pointing. Remove excess adhesive from the joints before it becomes too hard, leaving sufficient depth for the pointing mortar.
8. Point and finish the joints
Fill the joints fully and finish them with the chosen profile, such as bucket handle, flush, recessed or weather-struck. The pointing colour and finish have a major effect on the overall appearance.
The basic sequence includes preparation, adhesive application, slip placement, pointing and final brushing.
Why the Work Is More Difficult Than It Looks
Brick slips are sometimes marketed as a straightforward DIY product, but larger areas, corners, reveals, fireplaces and patterned bonds can quickly become complicated. Even small errors in setting out are repeated across every course and become increasingly visible as the wall progresses.
Uneven courses cannot be hidden by pointing
Poor corner details reveal that the finish is only a surface covering
Incorrect adhesives can lead to debonding or failure
Mortar smears can permanently stain porous slips
Badly positioned cuts can spoil an otherwise attractive installation
Brick Slips Around Fireplaces
Brick slips can be suitable around fireplaces, but the entire system must be appropriate for the expected heat exposure. The backing board, adhesive, jointing product and appliance clearances all matter. Standard plasterboard and ordinary tile adhesive may not be suitable close to a stove or high-temperature appliance.
Important fireplace note
Always follow the appliance manufacturer’s clearances and use a suitable non-combustible background and heat-resistant fixing system where required.
External Brick Slip Installation
External work must resist rain, frost, wind, temperature changes and movement in the building. It should be installed as a compatible system rather than using unrelated primers, adhesives and mortars. Movement joints must be correctly continued through the finish where required.
Common Installation Mistakes
Installing over loose paint, dusty plaster or an unsuitable board
Starting work before planning the bond and course heights
Following an uneven floor instead of using a level datum
Using inconsistent joint widths
Applying the wrong adhesive
Failing to alternate corner slips correctly
Pointing before the adhesive has cured
Using one box at a time and creating colour bands
Professional Brick Slip Installation
Beds, Bucks and Herts Brickwork provides professional brick slip and brick tile installation for homeowners, builders, designers and commercial clients. We can advise on bond patterns, corner details, pointing colours and the correct installation approach for the proposed background.
Fireplaces and chimney breasts
Internal feature walls
Extensions and garden rooms
External elevations
Commercial feature walls
Door and window reveals
Decorative and bespoke brickwork features
REQUEST A FREE BRICK SLIP INSTALLATION QUOTE
Send photographs, approximate measurements, the selected brick slips and details of any corners, openings or fireplace requirements.
Beds, Bucks and Herts Brickwork
Image note: replace stock/reference images with photographs of your own completed projects before publishing where possible.
Professional brick slip installation across Bedfordshire, Buckinghamshire, Hertfordshire and North London